.webp)
Motorcycle Starter Lithium Battery Installation Guide: A Complete Process from Preparation to Maintenance

Rayne Zhou
Account Manager
Customer Service | Launching Battery Marketing Project Management | Regular Content Updates| Search Engine Optimization
With advantages of light weight and high capacity, motorcycle starter lithium batteries are gradually replacing traditional lead-acid batteries. However, improper installation may lead to battery damage or potential safety hazards. This guide will comprehensively explain how to correctly install a motorcycle starter lithium battery, covering pre-installation preparation, step-by-step installation, and post-installation maintenance, so even beginners can easily master the process.
1. Pre-installation Preparation
The pre-installation preparation for lithium batteries directly determines the safety and stability of subsequent use, and this step is far more important than simply replacing the battery. First, it is necessary to confirm whether the motorcycle’s charging system is compatible with the characteristics of the lithium battery.
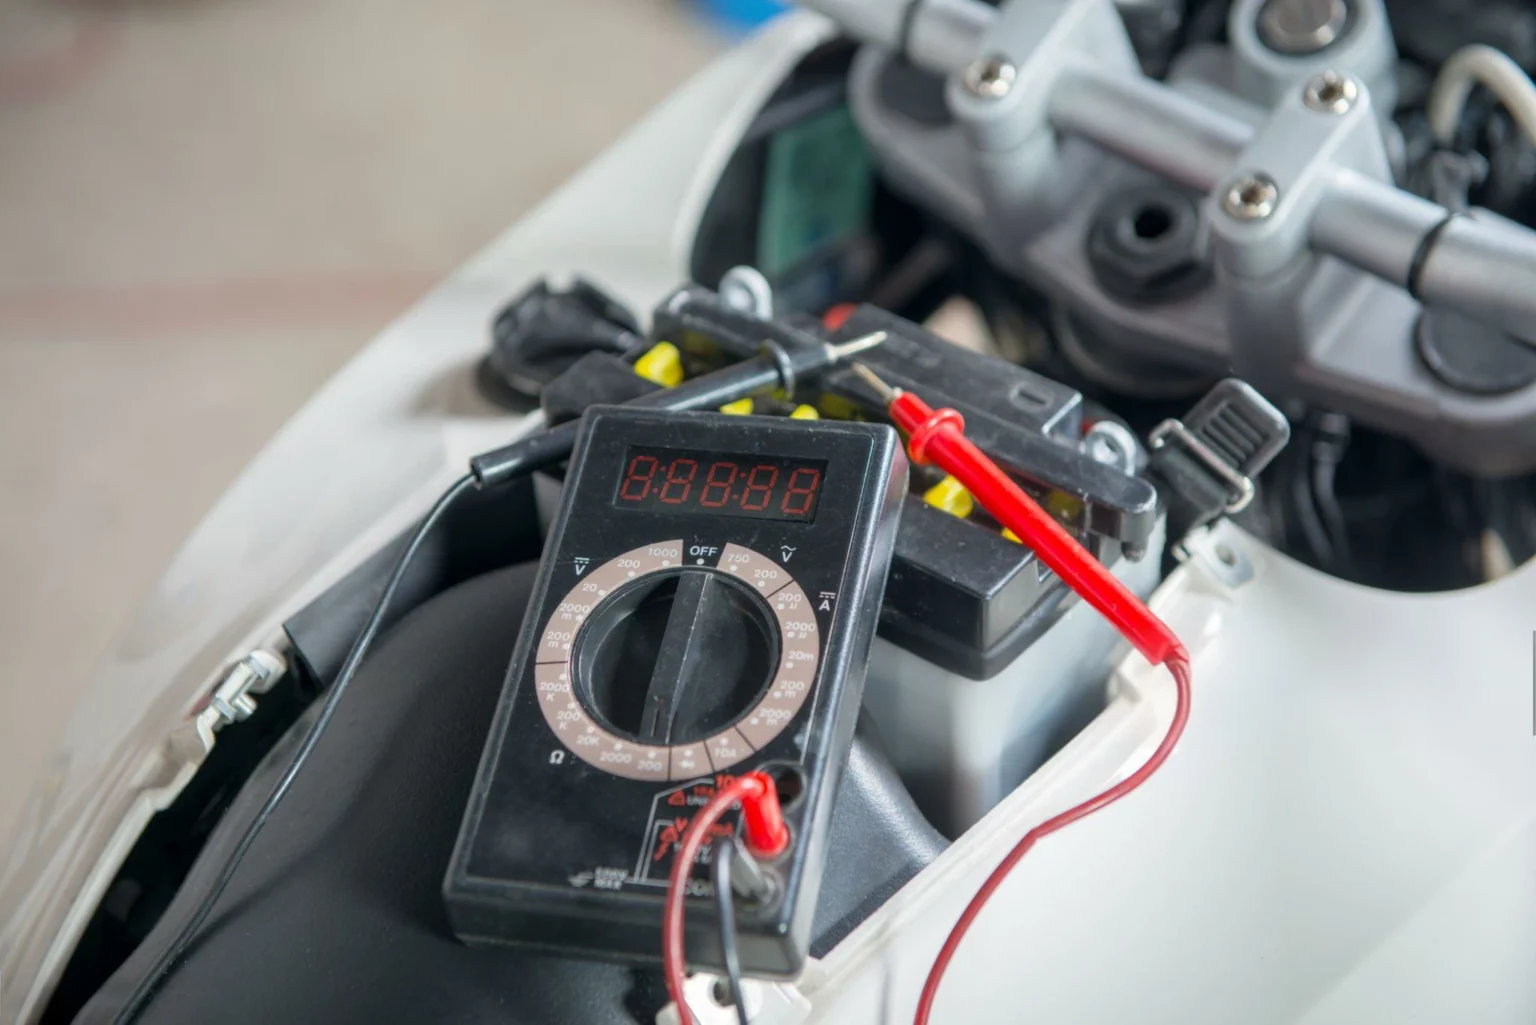
Charging system inspection is of top priority. Use a dedicated charging tester and follow these steps: connect the red wire of the tester to the positive terminal of the battery and the black wire to the negative terminal, start the motorcycle, and conduct tests when the speed is controlled at 2000 rpm and 5000 rpm, respectively. The normal charging voltage should be stably within the range of 14.0-15.0V — this voltage range is like the normal body temperature of a human. A voltage lower than 14.0V will cause the battery to be undercharged for a long time, similar to long-term malnutrition; a voltage higher than 15.0V will lead to overcharging, which is like the damage to the body caused by persistent high fever. If the voltage is abnormal, the charging components, such as the rectifier or generator, must be repaired first, and the new battery should not be installed forcibly.
Next, select a matching lithium battery. You need to check the suitable lithium battery specifications by referring to the motorcycle model or the original lead-acid battery model. Focus on two points: first, the polarity must be consistent with that of the original vehicle. If the positions of the positive and negative terminals are found to be reversed, contact the supplier for replacement immediately; second, the size must be compatible. Lithium batteries are usually 20%-30% smaller than lead-acid batteries, but they should not be too large or too small. For example, if the size of the original lead-acid battery is 150×87×105mm, the new lithium battery should be within this size range.
Finally, prepare necessary tools and materials: insulating gloves, a Phillips screwdriver, a multimeter (used to detect static power consumption), as well as foam gaskets and insulating gaskets attached to the battery package. At the same time, a dedicated lithium battery charger must be prepared, and under no circumstances should a lead-acid battery charger be used as a substitute.
2. Detailed Installation Steps
The installation process must strictly follow the principle of “disassemble first, install later; insulate first, energize later”. Each step is related to the battery life and riding safety.
When removing the old battery, the sequence of “negative first, positive later” must be strictly followed. First, use an insulating tool to loosen the fixing screw of the negative (black) cable, take off the cable, and immediately wrap the end with insulating tape to prevent a short circuit; then remove the positive (red) cable in the same way. During the disassembly process, note that: do not let the metal tool touch both the positive and negative terminals at the same time, and do not exert excessive force to twist the screw to avoid thread damage. After removing the old battery, clean the dust and rust in the battery tray, and check whether the fixing crossbar or buckle is in good condition.
Before installing the new battery, check the battery voltage first. Use a multimeter to measure the voltage. If it is lower than 12.4V, charge it with a dedicated charger first before installation. When placing the new battery, ensure that the direction of the terminals is consistent with that of the old battery; otherwise, the cable length will be insufficient. If the size of the lithium battery is smaller than that of the tray, two adjustment methods can be adopted: when the height is insufficient, stack dedicated gaskets at the bottom; for the gap on the side, use foam boards to fill and fix — these buffer materials can not only fix the battery but also absorb the vibration during riding and protect the internal structure of the battery.
The sequence of connecting the cables is the opposite of that of disassembly, which requires “positive first, negative later“. First, firmly connect the positive cable to the positive terminal of the battery. When tightening the screw, the force should be moderate. Too loose a connection will lead to poor contact and heat generation, while too tight a connection may damage the terminal; then connect the negative cable, and pay attention to the fixing force as well. After the connection is completed, check whether the insulation layer of the cable is damaged, and whether the terminal is completely wrapped by the cable without exposed metal parts.
Finally, reassemble and test: install the battery case and all disassembled parts back, and ensure that no cables are squeezed or pinched. After completion, insert the key to energize, observe whether the instrument display is normal, then start the motorcycle, and pay attention to whether there is any abnormal noise during idling and acceleration. After a successful start, let the engine run for 5 minutes, and use the tester again to check whether the charging voltage is within the normal range.
3. Key Precautions and Technical Principles
The characteristics of lithium batteries determine that there are significant differences in use between lithium batteries and traditional lead-acid batteries. Understanding these differences can help you better maintain the battery.
The Battery Management System (BMS) is the core protection device of a lithium battery. Like an “intelligent housekeeper” for the battery, it can monitor voltage, current, and temperature in real time, and automatically cut off the circuit in case of overcharging, over-discharging, short circuit, and other situations. However, do not over-reli on the BMS: continuous high-voltage input (such as over 15V) will cause the BMS to provide protection frequently, and may damage its chip in the long run.
The selection of the charger directly affects the battery life. Lithium battery chargers adopt the “constant current and constant voltage” mode, and will automatically switch to the constant voltage stage when the voltage reaches 4.2V per cell; while lead-acid chargers adopt the three-stage charging mode, and the continuous low voltage in the floating charging stage will cause overcharging of the lithium battery. Taking a 48V battery pack as an example, the output voltage of a lead-acid charger is usually 55-59V, which is much higher than the 54.4-56V required by the lithium battery. Mixing use may cause the battery to bulge or even catch fire.
The flexibility in installation direction is a major advantage of lithium batteries. Due to the sealed design and no electrolyte, lithium batteries can be installed horizontally, vertically, or even upside down, which brings convenience to the battery layout of special vehicle models. However, note that, regardless of the direction, ensure that the battery is fixed firmly to avoid terminal loosening caused by shaking during riding.
Static power consumption detection should not be ignored. After turning off the engine and pulling out the key, use the mA gear of the multimeter to connect in series with the negative circuit. If the static current exceeds 1mA, it indicates that the vehicle has a leakage problem. For example, installed anti-theft devices, GPS, and other equipment may cause excessive dark current, which will drain the battery power in the long run. In this case, a power-off switch needs to be installed.
4. Post-installation Maintenance and Life Extension Tips
Proper maintenance can make the service life of the lithium battery reach 800-2000 cycles, which is 2-4 times that of the lead-acid battery. The following are key maintenance points:
In terms of charging habits, the battery should be charged in time after each ride, and the power should be avoided from dropping below 20% — this is similar to the principle that the mobile phone power should not be exhausted before charging. The charging environment temperature should be between 5℃ and 45℃. Charging outdoors should be avoided in winter; the battery can be removed and taken back indoors for charging before installation.
For long-term storage, if the motorcycle is not ridden for more than two weeks, the battery power should be maintained at 65%-70% (factory power), and the battery should be recharged every two months. Suppose the battery is left on the vehicle, even if the vehicle is not ridden. In that case, it should be charged for 2 hours every 15 days, because the vehicle’s anti-theft system, Bluetooth module, and other devices will consume power slowly.
Regular inspection includes: checking the battery appearance for bulging and liquid leakage every month (although lithium batteries rarely leak, it may occur in extreme cases); checking whether the terminals are loose or oxidized every quarter, and wiping them with a dry cloth dipped in alcohol for cleaning; testing the charging system voltage once a year to ensure it is always within the safe range of 14.0-15.0V.
Riding habits will also affect the battery life. Avoid frequent rapid acceleration and sudden braking, as such operations will cause the battery to discharge with large current instantaneously; overloaded riding will increase the battery load, and it is better to avoid carrying people or heavy objects when climbing hills, as these will accelerate battery attenuation.
Finally, a reminder:
“ the performance advantages of lithium batteries need to be realized through correct installation and maintenance, and the control of every detail can make your riding experience more reliable and long-lasting. If you encounter problems such as inconsistent polarity and excessive size difference during the installation process, it is recommended to contact professional technicians or battery suppliers, and do not install the battery forcibly.“
—— Rayne
Subscribe for Real-Time Industry Updates
Stay ahead with real-time, ad-free industry insights delivered straight to your inbox!
 Our updates are 100% focused on value—no spam, no ads, and you can unsubscribe with one click.
Rayne Zhou
Account Manager
Customer Service | Launching Battery Marketing Project Management | Regular Content Updates| Search Engine Optimization